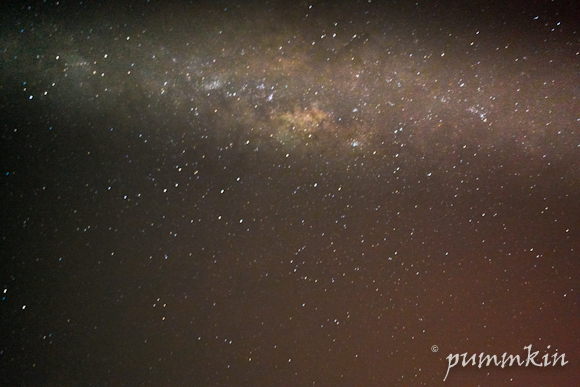
At Bulb mode, 57 seconds, F2.8, ISO 1000 with contrast adjusted for you to see the ”˜band.’
Recuperating from a weekend of chasing birds at the Wings of KKB Selangor Bird Race 2013, I came home with the 3rd prize of a trophy, a Deuter Pulse 40 EXP waistpack & a certificate. Seizing the day of high pressure in the atmosphere, I decided to have a go at astro photography again, now that I live so far out from the city. After dinner, we set out to look for a dark spot in the countryside in Semenyih. We set up our tripods & in the total darkness, we fumbled as the lights from our LED torches temporarily blinded us whenever we switched off for shutter release. Remembering I had the red LED setting on my Petzl e+Lite headlamp, it made it easier to operate in the dark without causing dizzy spells.

As Earth is part of the Milky Way, we can only see speckles of dust or what our eyes can make out as haze or clouds. Looking for the ever-so-familiar sight of the Milky Way, I could only guess which part of the sky it was. I had my Google Sky Map app with me & it provided a very precise location of the constellations in the sky, relative to where I was. Here are the instructions on how to equip yourself & find the Milky Way with your eyes!

The equipment I brought along with me:-
1) Camera – I used the Samsung NX200 mirrorless hybrid for this.
2) Samsung 20mm F2.8 lens
3) Manfrotto MKC3-H01 tripod with movie head
4) Asus Padfone Station
5) Petzl e+Lite headlamp (Get it from Lafuma!)
6) Folding chair
And essentials that you should have with you:-
1) Mosquito repellant.
2) Snacks & drinks to quell hunger pangs when you get too excited.
3) Blinkers to mark yourself in the dark.
4) A multitool to operate quick-release plates/screws etc.
5) Hammock & pillow if you get too sleepy waiting for clouds to pass.
6) An entourage.

‘When observing the night sky, the term “Milky Way” is limited to the hazy band of white light some 30 degrees wide arcing across the sky (although all of the stars that can be seen with the naked eye are part of the Milky Way Galaxy). The light in this band originates from un-resolved stars and other material that lie within the Galactic plane. Dark regions within the band, such as the Great Rift and the Coalsack, correspond to areas where light from distant stars is blocked by interstellar dust.’ – wikipedia.
At different times of the month, you might be able to see it if you find Pluto & a great way to do so is to do a search in Google Sky Map app on your Android device or any other star gazing apps such as Stellarium on your laptop, to point you to the exact location in the sky relative to where you are standing. Make sure your GPS is also turned on in your device.
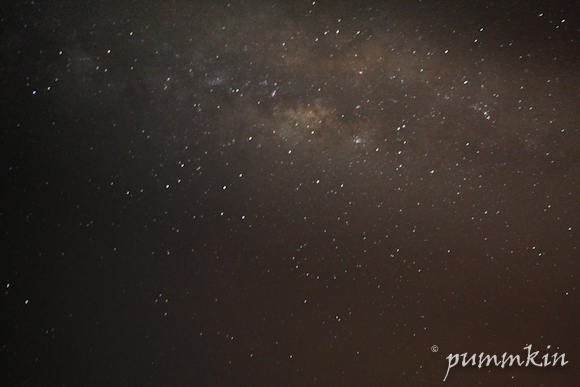
At Bulb mode, 60 seconds, F2.8, ISO 800, only brightness adjusted.
If you have a bright wide angle lens, use that instead. Telephoto lenses are good for taking pictures of planets, not constellations unless you have a specific constellation that you want in a frame. I have yet to experiment with other lenses & will post an update here once I do. Depending on your settings, the general rule is, the bigger your aperture (smaller F-stop), the more light it allows but to keep the image sharp, you need to keep ISO low (800 or 640) in order to keep the blacks. A minute or less should be sufficient but then again, experiment with stopping up on the ISO or time to get the desired results.
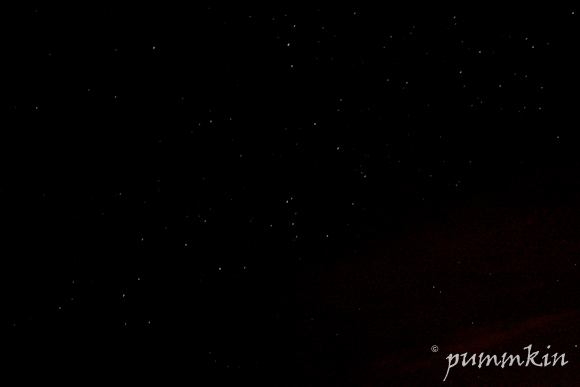
Then I tried to take just the stars at F8.0, 37 seconds at ISO 2000 & all I got were the constellations!
I couldn’t adjust my tripod head to tilt any further as this cluster was already too high up in the sky. Your camera may or may not allow you to have priority release of shutter regardless of whether you can focus on anything or not. In my case, my camera has to be set on Manual mode, Manual Focus & Multi Point Focusing. Adjusting the focusing ring on my lens through the CCD & LCD in the dark is a great pain. Literally, my neck was craned as I had positioned my tripod over my seat to look into my screen as it pointed upwards to the sky. A lot of the aim, is GUESSWORK. Pressing the shutter release was the start, waiting for a minute or so was expected but as soon as you press the shutter again, the camera went into a processing mode which took another minute & during this time, you shouldn’t move your camera or tripod in case the shutter hasn’t really closed yet. I heard a third sound when the processing was done. Through the 4 – 5 hours of shooting, I only managed 30+ pictures, of which only 3 or 5 were usable so don’t fret if you don’t get your pictures on the first try!
Here are some of my fluke shots, the frustration that you get after waiting for the picture to be processed…..
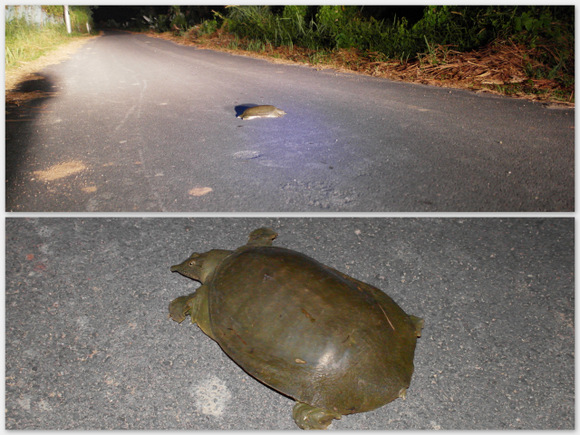
Best time to plan for a starry night, weather & elements dependent, is to use a Moon Phase widget on your Android device to help you decide on the days where the moon would be below the horizon. The best time would be when it’s at waxing crescent or waning crescent, what we know as new moon. Search for an ideal spot to include some trees or landscape in your picture BEFORE your actual night of shooting. This would help with any impromptu decisions to go stargazing whenever the skies are clear. Be aware of your surroundings though. You may not be able to see what’s around you but it doesn’t mean that you are not being watched. Nocturnal animals are out & about too. I found a Terrapin crossing the road & stopped to take a photo of it!
Let me know if you have succeeded in taking any photos of the Milky Way!

Tx for the informative article and steps mentioned. Would love to do this sometime – but need to get away from light noise which is everywhere-and fight the desire to zzz.
Will keep you updated when there’s another stargazing activity some time! Will wait for the next new moon!
Hi pummkin,
Thanks for this very wonderful piece of milkyway article.
If I may ask, where was the location you shoot this?
I have 2 spots one in Sekinchan and another in Batu Pahat. Looking forward to add more milky location to my portfolio.
Thanks
-BP-
Hi BP! I was in a kampung in Broga & forgot to log my location! I was told that there’s a farm/resort nearby here that mainly caters to stargazers as the weekend astronomers would go with their mats & telescopes to see stars! Will post it here once I have some information!